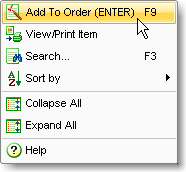
Use the “Products Catalog” window to add new items to order
- Double-click on the item to be added
- Press the Enter key on the keyboard
- Press the F9 key on the keyboard
- Click on the ‘Add to Order’ button on the toolbar
- Select the “Add to Order” item on the context menu
Performing any of these actions will open the window, where you will need to specify the quantity of the product to be added to order.
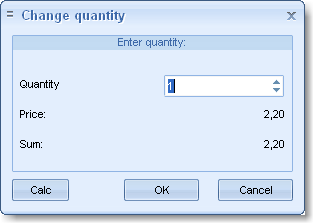
Enter the quantity and then click OK. The order total will be updated automatically.
Click on the Calc button to open the calculator should you need to make any
additional calculations.
If you have changed your mind or entered an incorrect quantity of the
product, you can edit it on the “Your Order” tab.
Once the order is entered, you can format it for printing or for sending
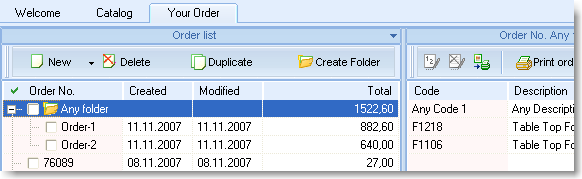
over E-Mail. Click on the “Your Order” tab.
The order window has two parts: Orders List and Order Products
in the selected order.
The items that you add will be added to the order currently selected, so
please be careful. The
moment the Catalog is open, by default the software selects the first
order at the top of the list.
Whenever it may be necessary, you can create new orders and add items to them.
You can also create groups of orders (see “Consolidating
Orders”).
You can move
orders between groups by dragging them with the mouse, while holding
the left mouse button pressed.
The upper part of the window contains the most frequently-used buttons
for the operation over order lists.
The right part of the window contains the list of items in the current order.
The upper part of is contains the toolbar.
Setting the mouse pointer over a button on the toolbar will display
The tooltip balloon (from the left to the right):
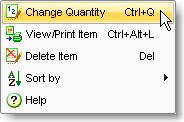
- Change the quantity of the current item. (Can be also called by double-clicking on the item.)
- Remove current item.
- Preview/print images.
- Print order.
- Submit order via E-Mail.
- Display help.
The additional and same functions are also available through the context
menu that appears by right-clicking on the item.
“Preview/print image” – quick preview of current item’s photograph; helpful with large orders, for reminding and printing information.
The item quantity editing window can also be opened by double-clicking on the selected item.
Once the order is created, you can either exit from the application (the order will be saved automatically), print the order for sending it via fax (all the necessary information on the customer and supplier will appear on the hardcopy), or submit it via E-Mail, directly from the application (make sure you are connected to the Internet before sending the order; see more on e-mailing / printing orders.)
Saving order RTFConsolidating orders
This tool is crucial and helpful for large organizations where orders from multiple employees or departments are to be accumulated and submitted to the supplier as a single order.
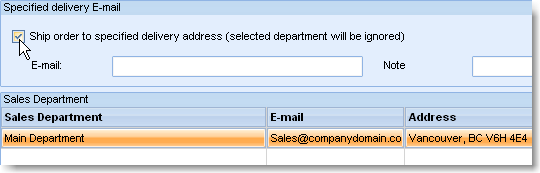
When submitting an order, you will be offered to select the supplier’s branch office to the one that is most convenient for you. (If necessary, you can change it by clicking on the “Change” button in the order submission window.)
If the branch office selection window has the E-Mail field at the top, the order consolidation function is available for you, and it is not available otherwise. That means that the person created the catalog hasn’t assumed this feature necessary.
Using the catalog CD received from the supplier, you can install the catalog on your employees’ computers. (Read more…)
Tell your employees that will create orders which e-mail address is to be entered in the E-mail field at the top. This way, their orders will not be sent to the supplier directly but instead they will be delivered to the person in charge for consolidating the orders. This step is to be done just once; further on, your employees will create and submit their orders normally, not bothering about the recipient.
The employees’ physical location in this case doesn’t matter.
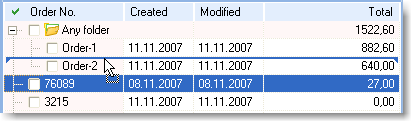
The employee in charge for consolidating orders is to create a new folder in the orders list.
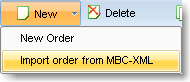
The order files received via e-mail will have names like 123456.mbco; simply drag them from your e-mail application to the corresponding folder in the orders list or add the received order file by selecting this command on the menu:
The order will appear as follows:
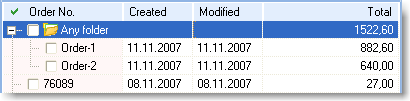
When all orders are accumulated and approved by the coordinator, the consolidated order ‘Any folder’ will be forwarded to the supplier’s address.