A Guide to E-commerce Integration (Joomla & OpenCart)
MyBusinessCatalog provides powerful tools to automate product uploads to your online store. This guide explains the settings for syncing your catalog with popular e-commerce engines.
Looking for the business benefits? This is a technical guide. To learn why automating your store is a smart business decision, see our main E-commerce Integration feature page.
On This Page
Accessing the E-Store Tool
To open the online store synchronization window, click on the E-Store button on the main toolbar or select the Publish → E-Store item from the main menu.

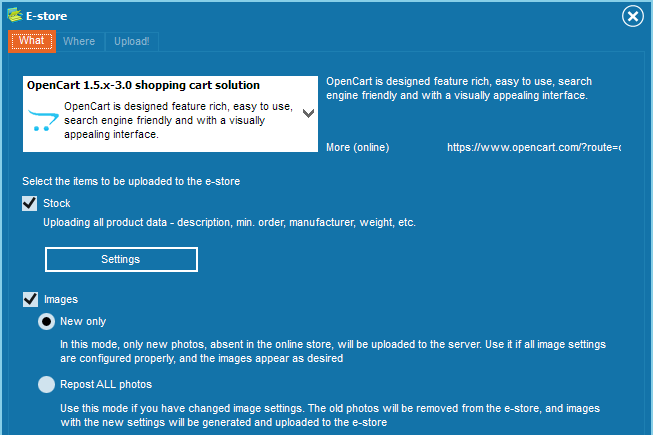
The 'What' Tab: Selecting Content
This tab controls what data will be sent to your online store.
- First, choose the store engine you use (e.g., OpenCart, VirtueMart for Joomla).
- Next, select which product groups you want to upload.
- Finally, choose the objects to be uploaded. For routine price or stock updates, you can uncheck "Images" to significantly speed up the process.
The 'Where' Tab: Connection Settings
This tab requires the connection details for your online store server. These settings allow MyBusinessCatalog to securely connect and transfer data.
For a commercial version, you will need to install our integration scripts on your server and enter your store's URL and authentication details here.
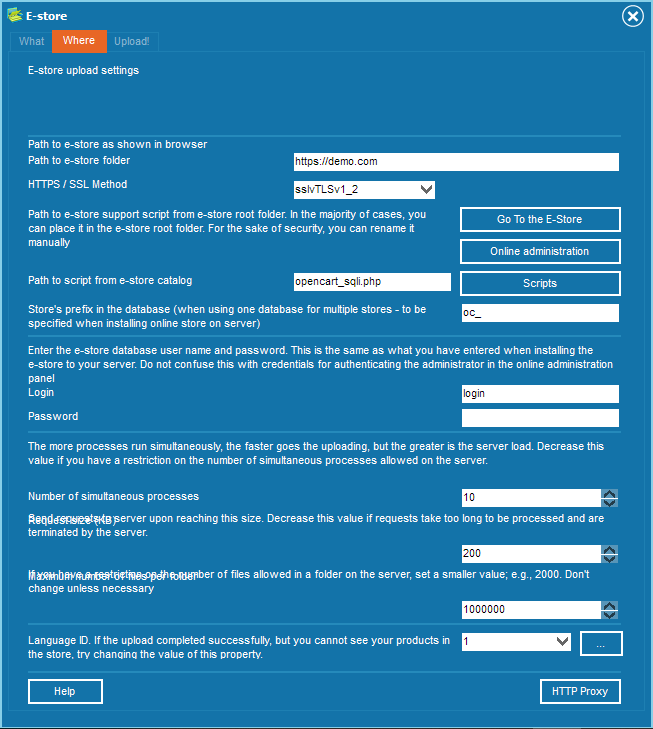
Free Trial Users: You can test-drive this feature without any server setup! Simply select one of the free demo servers from the list to upload your data and see how it works.
The 'Upload' Tab: Launching the Sync
Once you have configured what and where to upload, this tab is your final step.
- First, click the Test button. This will check if the connection details on the 'Where' tab are correct. If it returns an error, double-check your path, login, and password.
- If the test is successful, click the Start button to begin uploading your data.
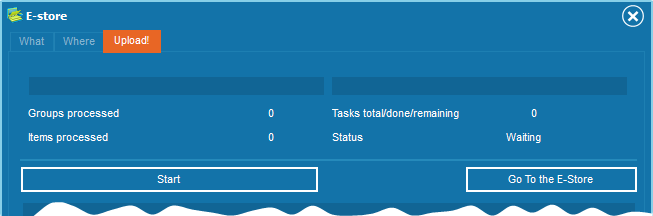
After a successful upload, you can view the result by clicking the Go to the E-Store button on the 'Where' tab.
Your Online Store is Synced!
You have successfully configured and run the synchronization. Now, any future updates to your product catalog—be it new products, price changes, or new photos—can be pushed to your live website in minutes, not hours.
For more advanced options, explore our guide on setting up image processing.